Alternative outputs
Overview
Teaching: 15 min
Exercises: 40 minQuestions
What output formats can I create?
Objectives
Produce several output formats from a single .Rmd document
Adjust content to be appropriate for the output format
Up to now, we have not looked too closely at the output end of our process. We have been leaving it up to the default settings to produce our final document as an html file. Let’s look a bit closer at how we can control precisely what final document we create.
Output options
Each output format has a number of options that can be used to change the final appearance of your
document. For example, you can see the list of options for our html documents by checking the help
file: ?html_document.
These options can be set by providing values in the header of your R Markdown file
---
output:
  html_document:
    toc: TRUE
---
Additional options can be provided on separate lines. The indentation of these lines matters, so make sure you have everything aligned correctly.
Changing options
After each of the following steps, knit your document and see what the effect of each option is.
Make sure you have headers at various levels (
#,##,###,####) in your document. Set thetocparameter to beTRUEas in the above example. What headers are recorded in the table of contents?Add an additional option setting
toc_floatto beTRUE.Set the
code_foldingoption toshoworhide. After rendering your document, use the other value to see the difference. How doescode_foldinginteract with code chunks where you have set theechoparameter to beTRUEorFALSE?Test out various combinations of the
themeandhighlightoptions. Can you find one you prefer?
Using references
If you are looking at producing manuscsripts for publication, you will want to be able to include
references in your final document. Use the bibliography option to point to your reference information
in a supported format.
Some common formats include Bibtex (.bib) and Endnote (.enl) formats.
To cite these references in your document, put them within square brackets with an @ followed by
the citation key from your bibliography:
Statement needing a citation [@<cite_ref>].
At the end of your document add a first level header for the references:
# References
and it will be filled in appropriately when you knit your document.
Alternate outputs
If you are wanting to produce something other than an html document, you can change the output format in the header block. There are a number of different inbuilt output formats you can create, and there are also several packages you can install that provide access to additional formats.
Word documents
To create a Word document from your R Markdown file use the word_document output format.
The output will use a default style for the formatting, but you can alter this styling by providing a reference word document to copy the style from.
Getting wordy
Change the output format of your document to a Word document (removing all the output options) and knit it.
Review the document you produced. Are there any major differences to your html output?
Practice styling your document by:
- Saving the document with a new name (eg.
Template.docx)- Modifying the styles in the document using the Styles Pane (just modify, do not create new styles)
- Save the new template
- Knit your document again, setting the
reference_docxoption to your style template.
PDF documents
To create a PDF document, use the pdf_document output format.
PDF documents are created using Latex, which you will need to install on your machine separately. Trying to knit your PDF document without Latex installed will result in an error along with suggestions for how to install it on different operating systems.
Presentations
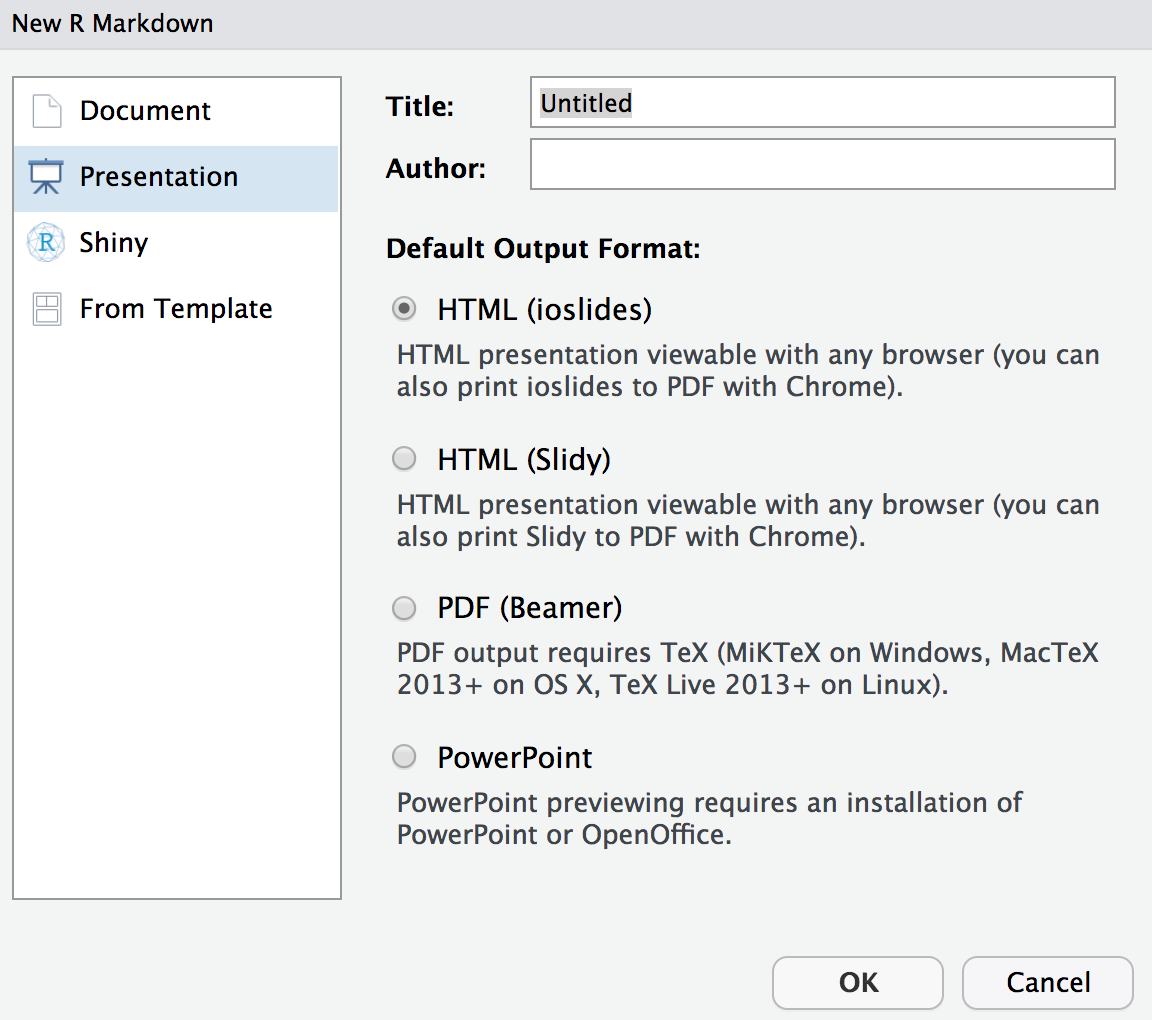
It is possible to create presentations from your R Markdown document should you wish to make your talks reproducible as well. There are several options for presentations that you can see by creating a new R Markdown file (“File” > “New File” > “R Markdown…”) and then selecting the “Presentation” tab.

These formats create either an HTML, PDF or Powerpoint presentation using your R Markdown file to define
the content of each slide. For example, to create an ioslides presentation, set the output format in your
R Markdown header to ioslides_presentation.
For an alternative, you could install the xaringan package which produces HTML presentations built on the
remark.js library. This output format is a little more flexible that the inbuilt
ioslides and Slidy formats which allow you more freedom in customising how your slides look and perform.
Presentations
Since slides will usually require you to write your content in a different way to a report, make a copy of your R Markdown document. Then, pick a format and turn your document into a presentation.
The presentation templates will give you some indication of how to use R Markdown to specify slide content. More details can often be found in the help page for each format. For example,
?ioslides_presentationfor help with an ioslides presentation.
Other formats
There are a wide range of things that can be done with R Markdown. It is possible to produce books, websites and blogs from your R Markdown documents.
Key Points
Control the output format in the YAML with
output:References can used in bibtex format